GitHub Tutorial
GitHub
- a tool that supports collaboration on coding projects
- useful features:
- version control
- easy collaboration
- organization
Making a GitHub Account
To start using GitHub, you’ll need to make an account first. A free GitHub account will allow you to create unlimited repositories. Sign up here.
Using Github
1. Using the UI (GitHub Website, GitHub Deskstop)
The GitHub GUI and GitHub Desktop are great tools for coders that are newer to Git and command line interfaces. They are both easy to use. You can download GitHub Desktop here.
Creating a Repository
Navigate to the main GitHub homepage https://github.com. To create a new repository you can either click the green New button, or head to the top right and click the plus dropdown then New repository.
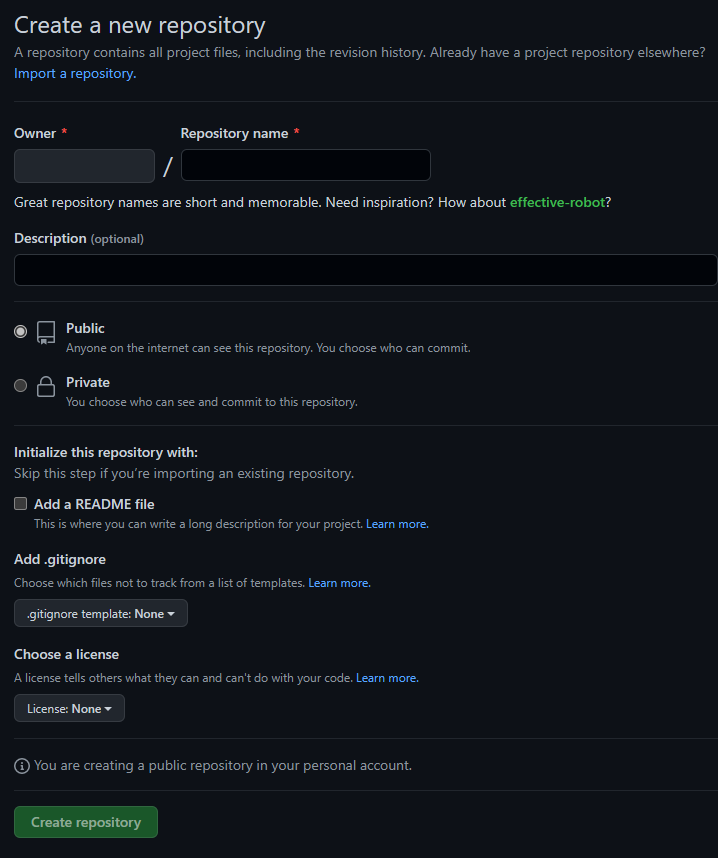
You’ll see a page similar to the one above, with the owner different. Name your repository something simple yet descriptive (you can change it later).
Next, you can add an optional description for the repository.
Choose the visibility of your project. Public repositories can be seen by anyone on the internet, while Private repositories can only be accessed by people who have permissions.
Make sure the README box is checked. A README file is in markdown, and it lets you tell people what your repository is about.
Committing
Once you have created your GitHub Repository, open GitHub Desktop and clone the repository. This is done by going to the top left, clicking file and then clone repository. Add the link of your repository or find it from the list.
Once you have made changes to the file, the changes will show up on the left hand side under Changes. Clicking through the different changed files will show you what has been added or deleted. To create a commit, add a commit message in the box that says Summary (required), and add an optional description. Click the blue commit button.
Pulling and Pushing
Once you have commits, remember to push commits to the actual GitHub repository (creating commits doesn’t actually change them on the repository) by clicking the third button at the top. The button will say Push Origin with a number next to it (the number of commits you have).
When your team members commit their changes, you’ll be able to press the same button to Pull Origin with the same button, and add all of their changes to your local repository.
2. Using the Command Line
To use the command line, you’ll need to install Git.
Git Bash for Windows
When you install Git for Windows, it will come with its own terminal where you can run commands. Here is a tutorial on how to configure it.
Linux Installation
If you are using a Linux OS, check your Linux distribution’s package repositories and package manager for the Git package. Installation instructions can also be found on the Git website here.
Debian/Ubuntu: sudo apt install git
Fedora: sudo dnf install git
Arch Linux/Manjaro: sudo pacman -Sy git
Creating a Repository
To create your repository, navigate to the desired folder and run git init. A .git folder will be created. Link this to a remote repository by running git remote add origin https://github.com/<your username>/<repository name>.git. You will have to create a repository on the website first. For help with that, check out Creating A Repository With the GUI
Pushing and Pulling
Use git add <file name> to add changes in that file to your commit. Using git add . will add all files that have been changed.
To commit your changes, use git commit -m "commit message that describes commit".
To pull changes from the repository, use git pull <remote> <name of branch>, such as git pull origin main.
To push the files, use git push origin main, and it will push the files to the main branch. If you want to commit to another branch, use git checkout <name of branch> to switch that to your active branch, and git push origin <name of branch>.
If you’ve lost track of what files you’ve changed or you just want to check, you can use git status.
Git Terms
- branch: a separate version of your repository, usually used to test features before they are added to the main project.
- cloning: copying a repository from GitHub to your local machine as a functional repository.
- commit: changes to file in the repository, contain a message to describe what was changed.
- license: tells viewers what they can do with your code in this repository. Check out Github Licenses for more.
- main: the default branch, automatically created when a new repository is created.
- pull: taking commits on remote repository and putting them on your local machine.
- push: putting your local commits into the remote repository.
more terms can be found at GitHub Glossary